
In my cupcake liner era.
Recently, I ordered cupcake liners via Instacart because I wanted ... well .. instant supplies... and I wanted cheap and easy.
Last week, I shared my Halloween wreath made with Dollarama cupcake liners that were far too cute to scrunch.
This week, I'm showing you a non-seasonal cupcake liner craft you can do in any colors.
But it does involve scrunching.
My original Pinterest search lead me to several pins of these flowers. I like to view lots of tutorials and then try it on my own. So my Pinterest board is pretty full.
A basic flower is actually pretty easy.
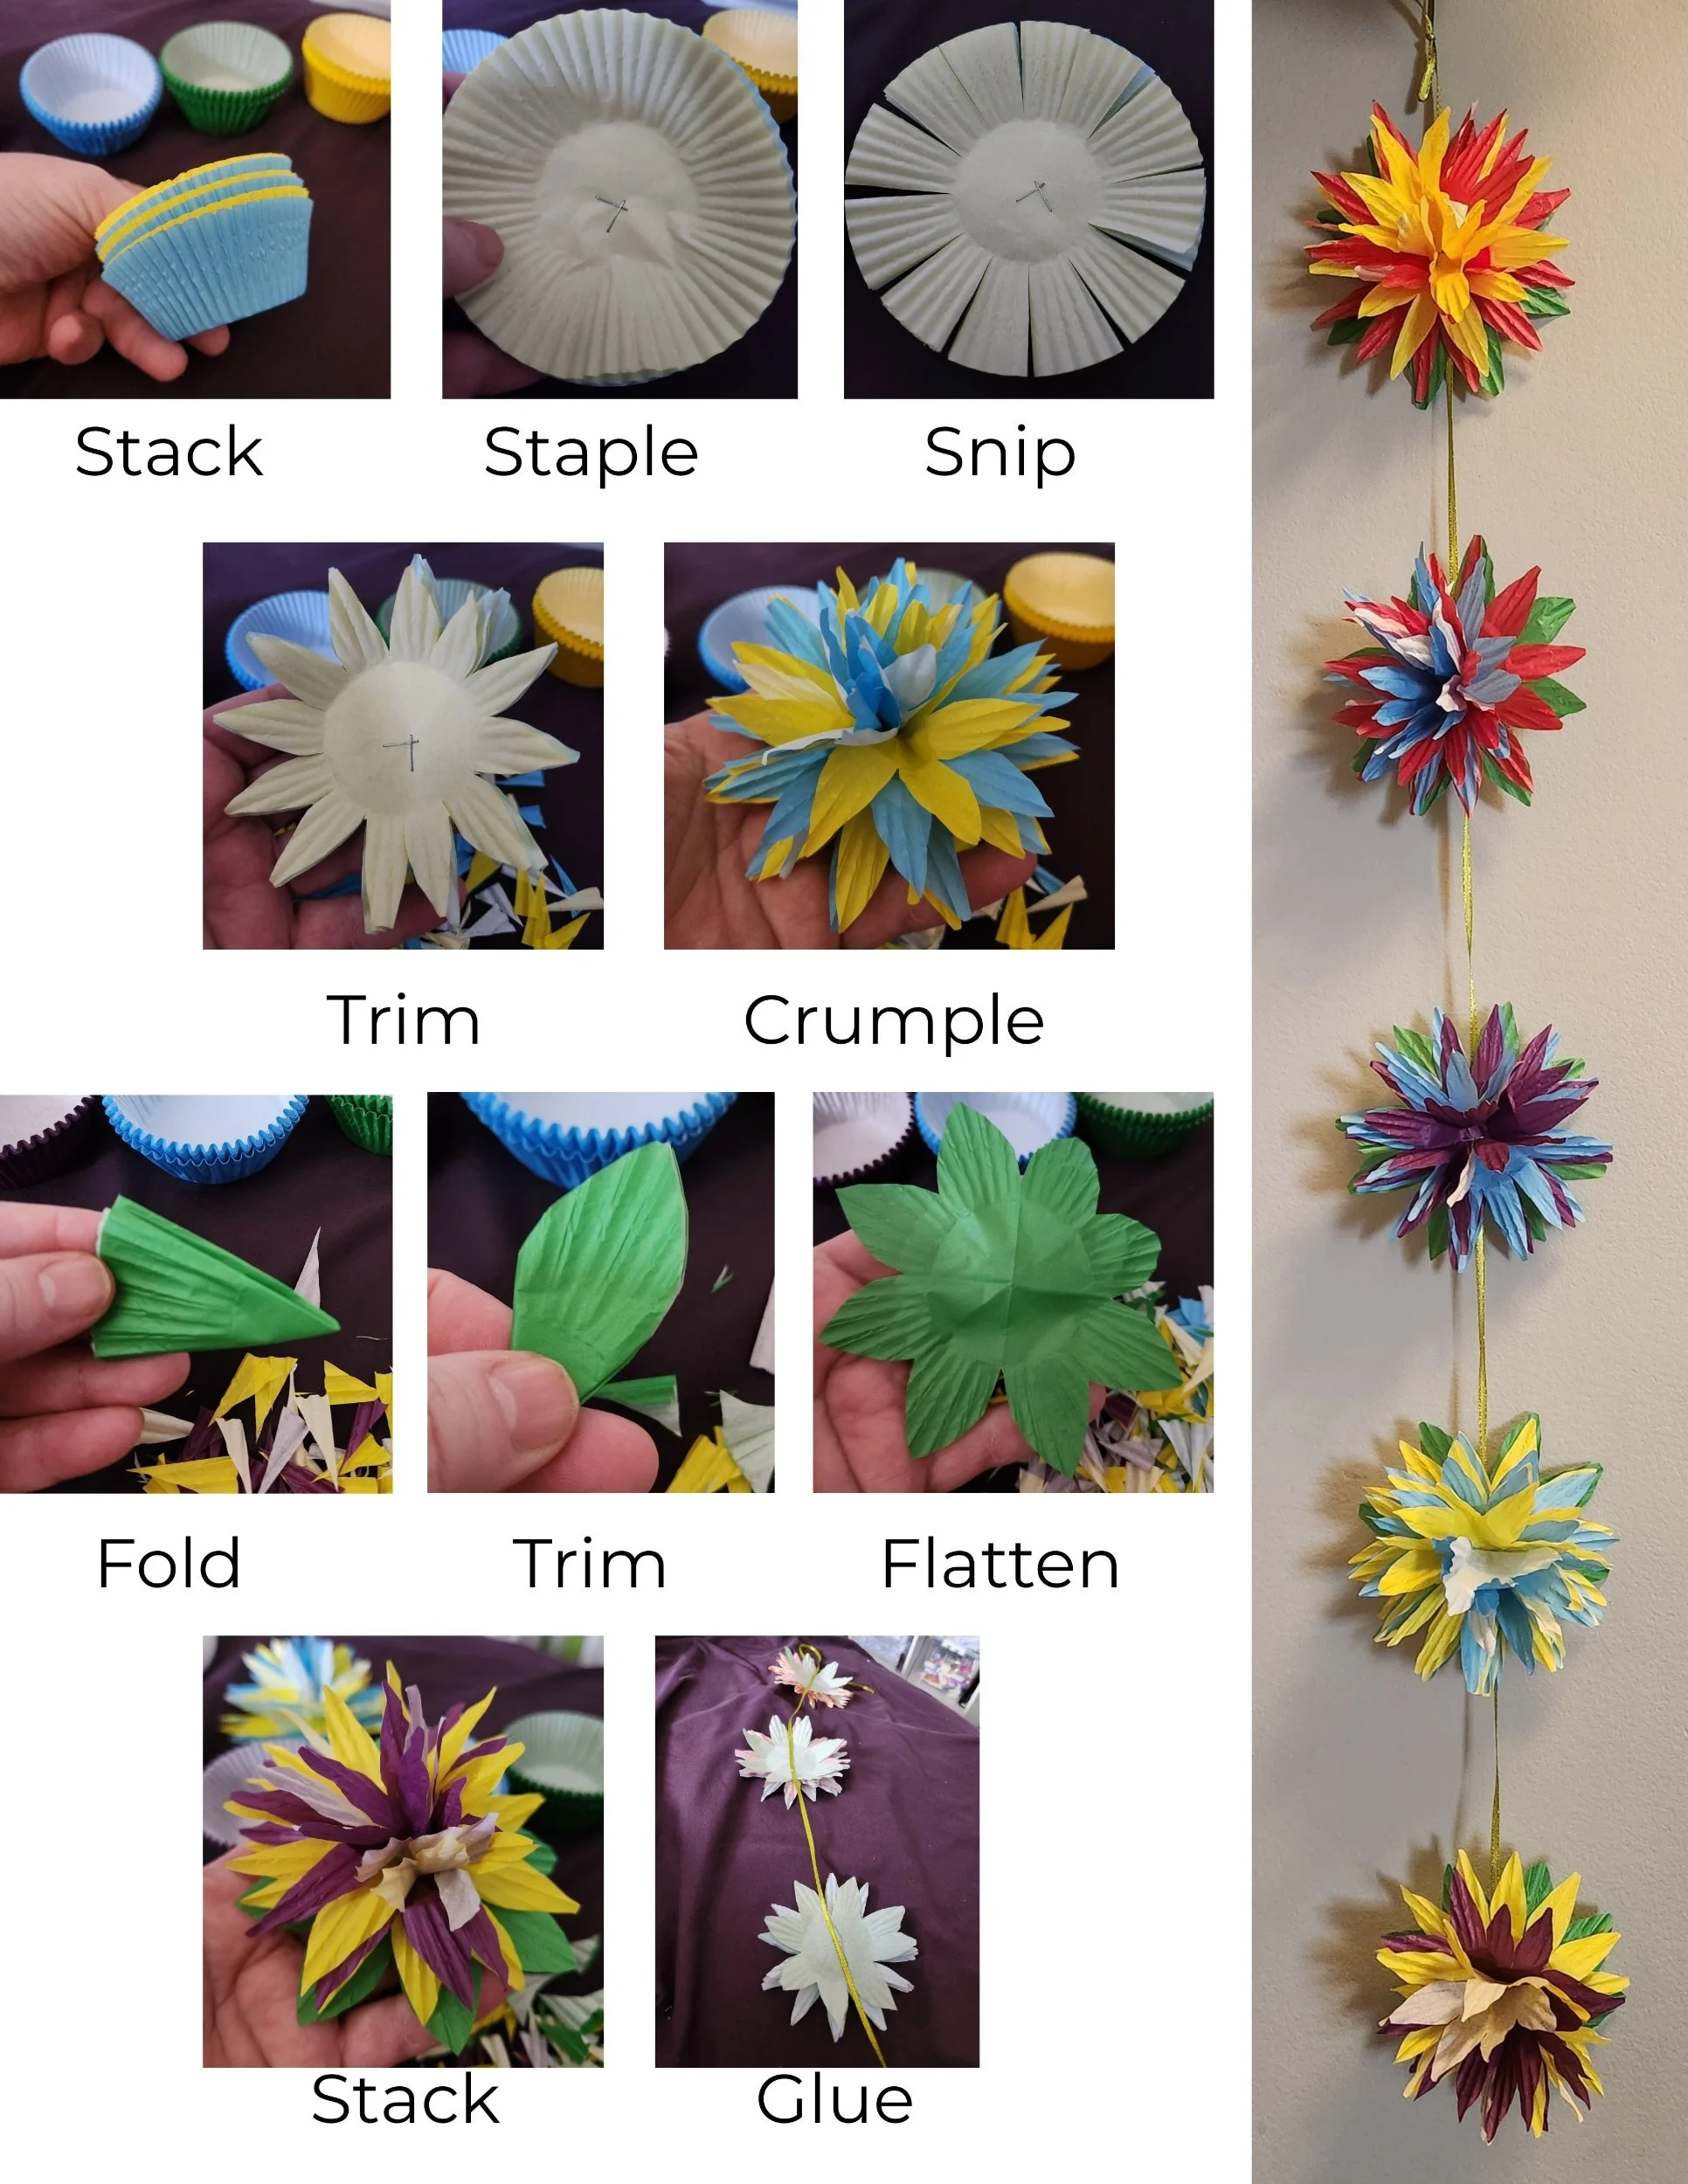
I stacked several cupcake liners together and stapled them through the middle. The first flower, I stacked 6. The second flower I tried 4, and honestly I don’t see much of a difference. So all my subsequent flowers are 4 (this means the supplies last longer - woot!)
Next, I made snips all the way around the ruffled edge, stopping before I reached the flat centre.
I then trimmed each section into petal-ish shapes.
And finally, the scrunching.
I turned the whole stack over, so the colors face upwards. Then I scrunched up and towards the middle, layer by layer, leaving the bottom one mostly flat.
And there it is: flower.
At this point, I wasn't sure what my plan was. So I did what I always do - I crafted lots.
For the leaves, I folded a green cupcake liner, trimmed it into a leaf shape, and flattened it back out. Then I glued it to the back of the flower.
I have a small (ahem) stash of ribbon and twine, so I decided I’d make a garland. And for a twist, I made it a vertical banner.
And that's how a pile of cupcake liners got hung on my wall.
I might do these again in just red and green and stick them all over a wreath. I have two left from the Dollarama package.
I also might never make one again and donate the rest of the liners.
That's how I roll. Or scrunch. Or never scrunch again.
